Thursday, July 21, 2016

Shipping: Pricing and Logistics, What to do?!

It won't fit into a sedan. 

On the scale at FedEx. 
So, I learned so much this last time around. Things have changed in the 8 years that I have been buying and selling these houses on Ebay (see older posts). Currently, USPS charges $169 to ship this, UPS is about mid way between USPS and FedEx. FedEx charged $92 to ship across the country from Southern California to NY. I opened an account and got a first timer discount reducing the cost to about $72 with tax. You could get that discount, too, if opening a new account.

Now that I have an account next time I print my own label and schedule a pick up- SO much easier!! It will go 4 day ground delivery, this particular box was 21x21x25 and total weight was 33 pounds. Shipping will be less if you live closer to your buyer. If you are the buyer and the seller is inexperienced and doesn't know what to do then you can tell them all of this so you get your house and not an email that says, "sorry, shipping was too high, I am cancelling the order". This way you get the best price and the house. =-)

You don't wanna go this route. So, if USPS is a billion dollars in debt, why doesn't the government just increase the budget? They aren't a company, there should be no 'profit' for heaven's sake! 

This is what has happened to me a few times, not great obviously. This is due to ignorant sellers and overpriced shipping. Shame it's not common sense to find out what something costs to ship PRIOR to listing it. This ended up being cancelled. Not sure what she did with the house. 

Thursday, July 7, 2016

What Should Packing Look Like?

Cushion the box bottom with a layer of packing paper and thin layer of either popcorn or shredding. 

Individually wrap every piece, even the larger ones. 

This is what the fully packed box will look like, walls are diagonal. the box here is 25 inches high, 26 inches wide and 22 inches long. 

Top off box will popcorn, shake so it settles, put in more popcorn in the space that appears on top, the grey bags here are styrofoam pieces that i happened to have, otherwise it would be more popcorn or crumpled up packing paper, or bubble wrap. its whatever is cheapest and easiest for you, just make sure its either styrofoam or air bubbles. 

This box is my own personal A Frame going back into storage. here, I am glad I stock piled bags and foam wrap through the year so I can use it now without having to run out to the store and buy anything. Admittedly, I use higher quality wrap for my A Frame, since 1, its a higher quality one than I am selling, and 2, almost no one uses any packing paper at all for shipping A Frames, so using anything is an upgrade. 

The best product I have found to date is foam wrap, its white, spongy, compact and gets the job done, its easy to cut and tape, it really made packing my A Frame for long term storage a breeze. It was actually left over from one A Frame that I bought a few years back, miraculously, it was so well packed. The box I stored it in is a box for plastic garage storage cabinet, its about the same size as the factory box, maybe a bit bigger, but it works great. 
When you receive your A Frame from an Ebay seller, you will want to use (if possible) the box and wrapping they used. That way when you go to sell or store yours you already have everything you need (hopefully). Sometimes I get my recently purchased house shipped in a garbage box with newspaper and walmart bags, so I wouldn't use that but use what you can.


When you are cleaning your A Frame use a toothbrush in this manor to get out dirt. 

When you are dusting the A Frame for storage or shipping, use a soft bristled paint brush like this to get dust out of the grooves. 


PLAN FOR THE WORST

THEY LEFT A 'SORRY' NOTE

These are 1/6 tulip chairs from ebay shipped from china, they actually emerged unharmed despite some crazy fool stomping onto of the box. not even a scratch, thank goodness, PS these are the most awesome chairs, the quality is what saved them, they are VERY well made and you will be very happy with them! =)

Tuesday, July 5, 2016

Replacement Patio Pieces and Doors: Outside the Box Idea

Didn't have my potted plants handy to stage this but you get the idea. 

Its shiny because its still in the wrapper 

Here is the name of who makes these cool colored cutting boards
I was shopping in a kitchen and restaurant supply store and came across the last one of the cool yellow cutting boards by Update International My base plates are fairly dark, so if you have base plates that are more faded, then it would be a better color match. theoretically they could be cut into triangles with a table saw. This was $15 so quite affordable if you can find it or order one online. The patio triangles are so rare since they were only issued in furnished houses in 1978.


Custom floor configuration. 
On the shelf at the 99 cent only store

The patterns on these thin metal sheets are a good match, they are affordable too! Hobby Lobby is where they can be found, just be sure to find a good way to cut it on a flat surface with a perfectly square angle. I bet once primed and painted, they are a good replacement for missing front doors. 
At Target, these are a very flat basket weave pattern, the inside is  perfectly flat. These can easy be painted yellow to be the replacement front doors. Just measure, cut with Dremel tool, paint and install (see post about replacement hinges). 
At Dollar Store, the patten would also work for doors, just measure, cut, paint and install. =-) 

Cut these down to size to make replacement doors, they cost $1 each, far cheaper than buying vintage, and are solid for those of you wanting more enclosure.


I would use an inexpensive dremel tool to cut them to door size.


At the 99 Cent Only Store, are these perfectly colored bins, just measure, cut and install!

Completed Renovation #7: Before and After


Yes, believe it or not this is the same house after a 1 week long restoration process. It arrived damaged, filthy, and neglected. After washing, polishing, replacing parts, painting parts and putting it all together it's another successful restoration. Insider tip: for photographing it for the resale, I do not use any long screws, I carry it into position by holding the base plates and leave the screws in a zip lock baggie (see in photo). They are not necessary to set the house up for display. Though I did use one piece of tape to hold the center piece white roof rafter together since it almost always bows outward. On this reno the pieces were white enough that I did not have to use any bleaching between cleaning and polishing.

House for Sale 

This house is clean. 

Nice rear. 

Squeaky clean! 
When out, I am always looking for suitable replacement parts for the house. I found this bathmat that has the exact same pattern of the front double doors and side panels. I think, to make upgraded custom replacement doors, one could cut to size, paint and affix to card board or some other strong yet thin material. 


Some will arrive to you this bad, definitely making a thorough shower necessary.  This tends to be what shows up on Craigslist, usually $80, and at least 2 hours drive time each way. Where do I sign, lol. 

Before and after. =-) 
Plan on this arriving from Ebay or Craigslist houses. They have been in the attic/garage/basement or outside for 20-30 years. I actually enjoy the whole restorative process since there is such contrast between the before and the after. My houses emerge from this process sparkling white and complete.=-) 

Make no mistake, when you order online, you will likely get a dirty, filthy house that to be cleaned properly, will need about an hour in the shower with a toothbrush and a good spray nozzle. Cleaning it first is the only way to have a minty finished product. 


It wil taken 2 cans of this to get the job done. (flat white spray can paint)

Restoring Damaged and Missing Post Covers / Sleeves : Summer 2016 Edition

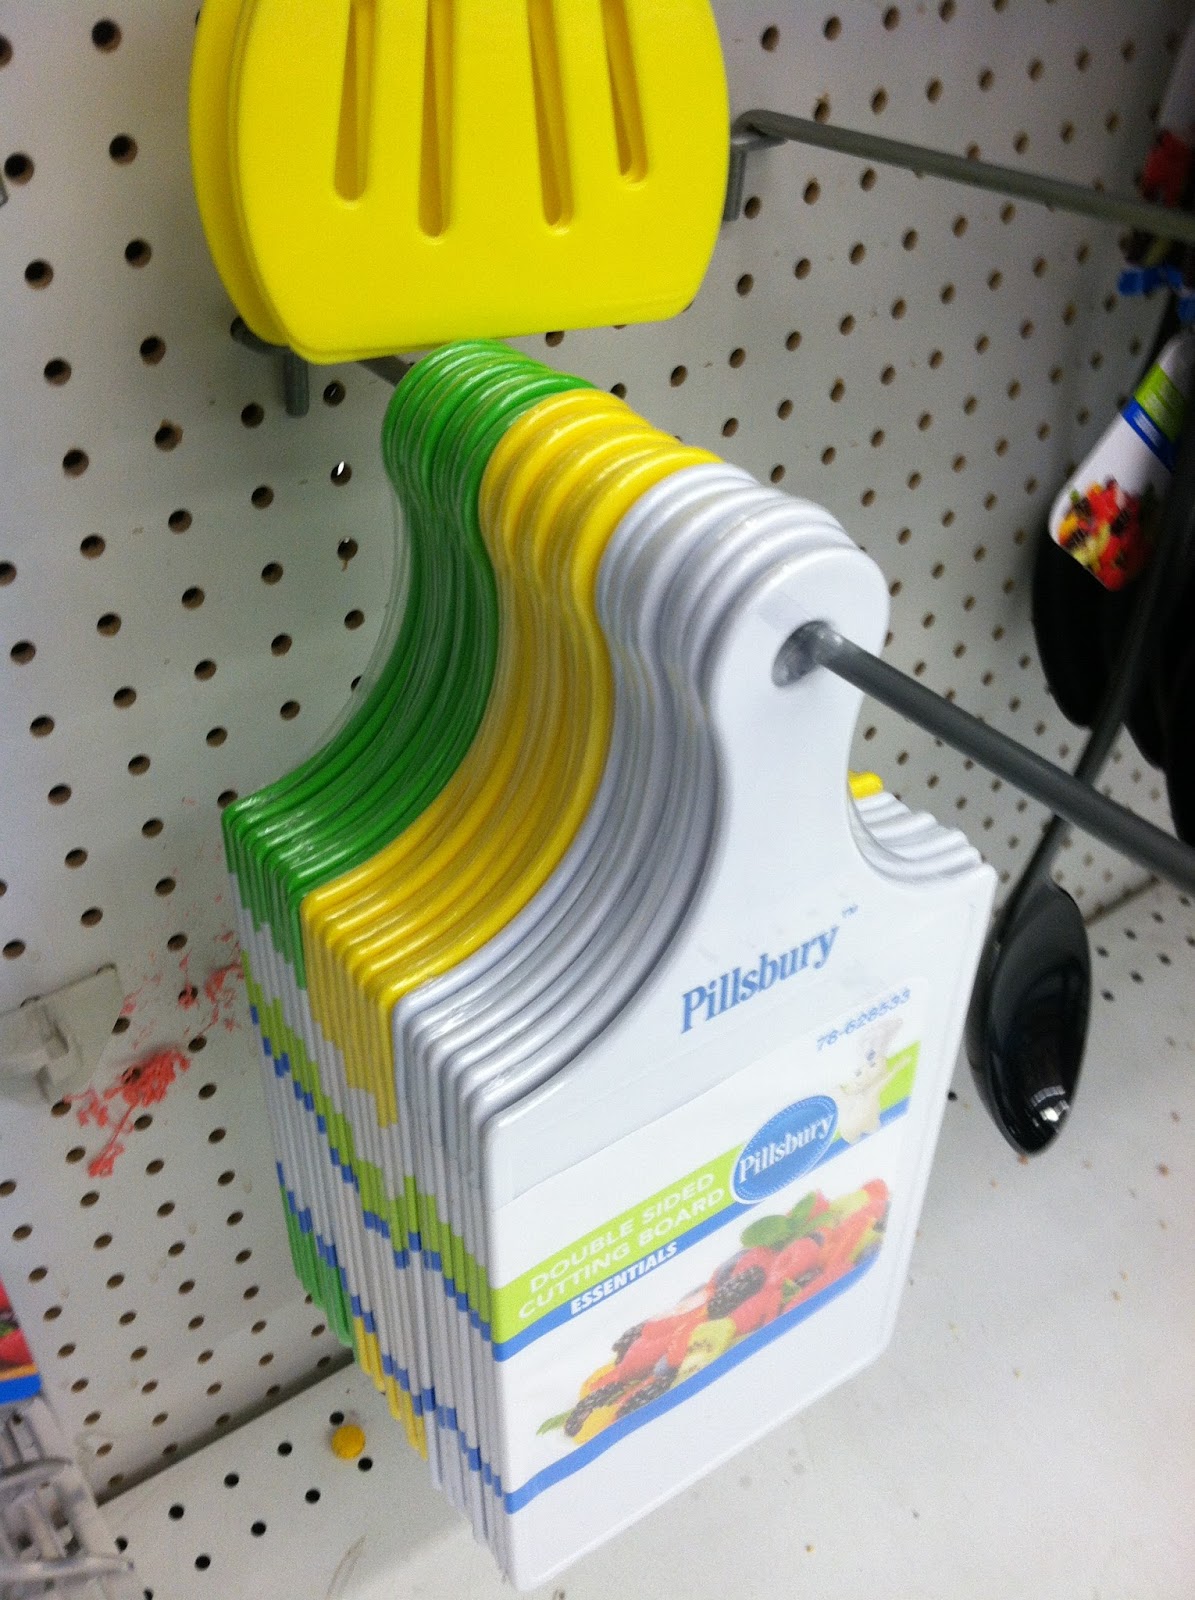
This is my newly complete set of post covers for the restoration house I am doing this week. Its about half vintage plastic and half dollar tree poster board. Not bad considering the brown shattered mess that arrived at the bottom of the shipping box last week. 

Make sure that the post is really all the way in via finagling it into all the corners, otherwise when you tap the base plates down to accommodate railings you risk chipping off plastic or creasing poster board replacement covers. 

The top post is pasteboard cover, the bottom one is painted plastic. 

Aerial shot, they tend to bow out a little bit even after creasing inward, so after a few hours or the next day, pinch them inward again so they hold position a little bit better. 

Poster board cover, they work surprisingly well. The only draw back is that they are crisp snow white, so if you are using a non painted house that is off white it sort of draws more attention to the difference in color, but it is still loads better than having no covers at all. 
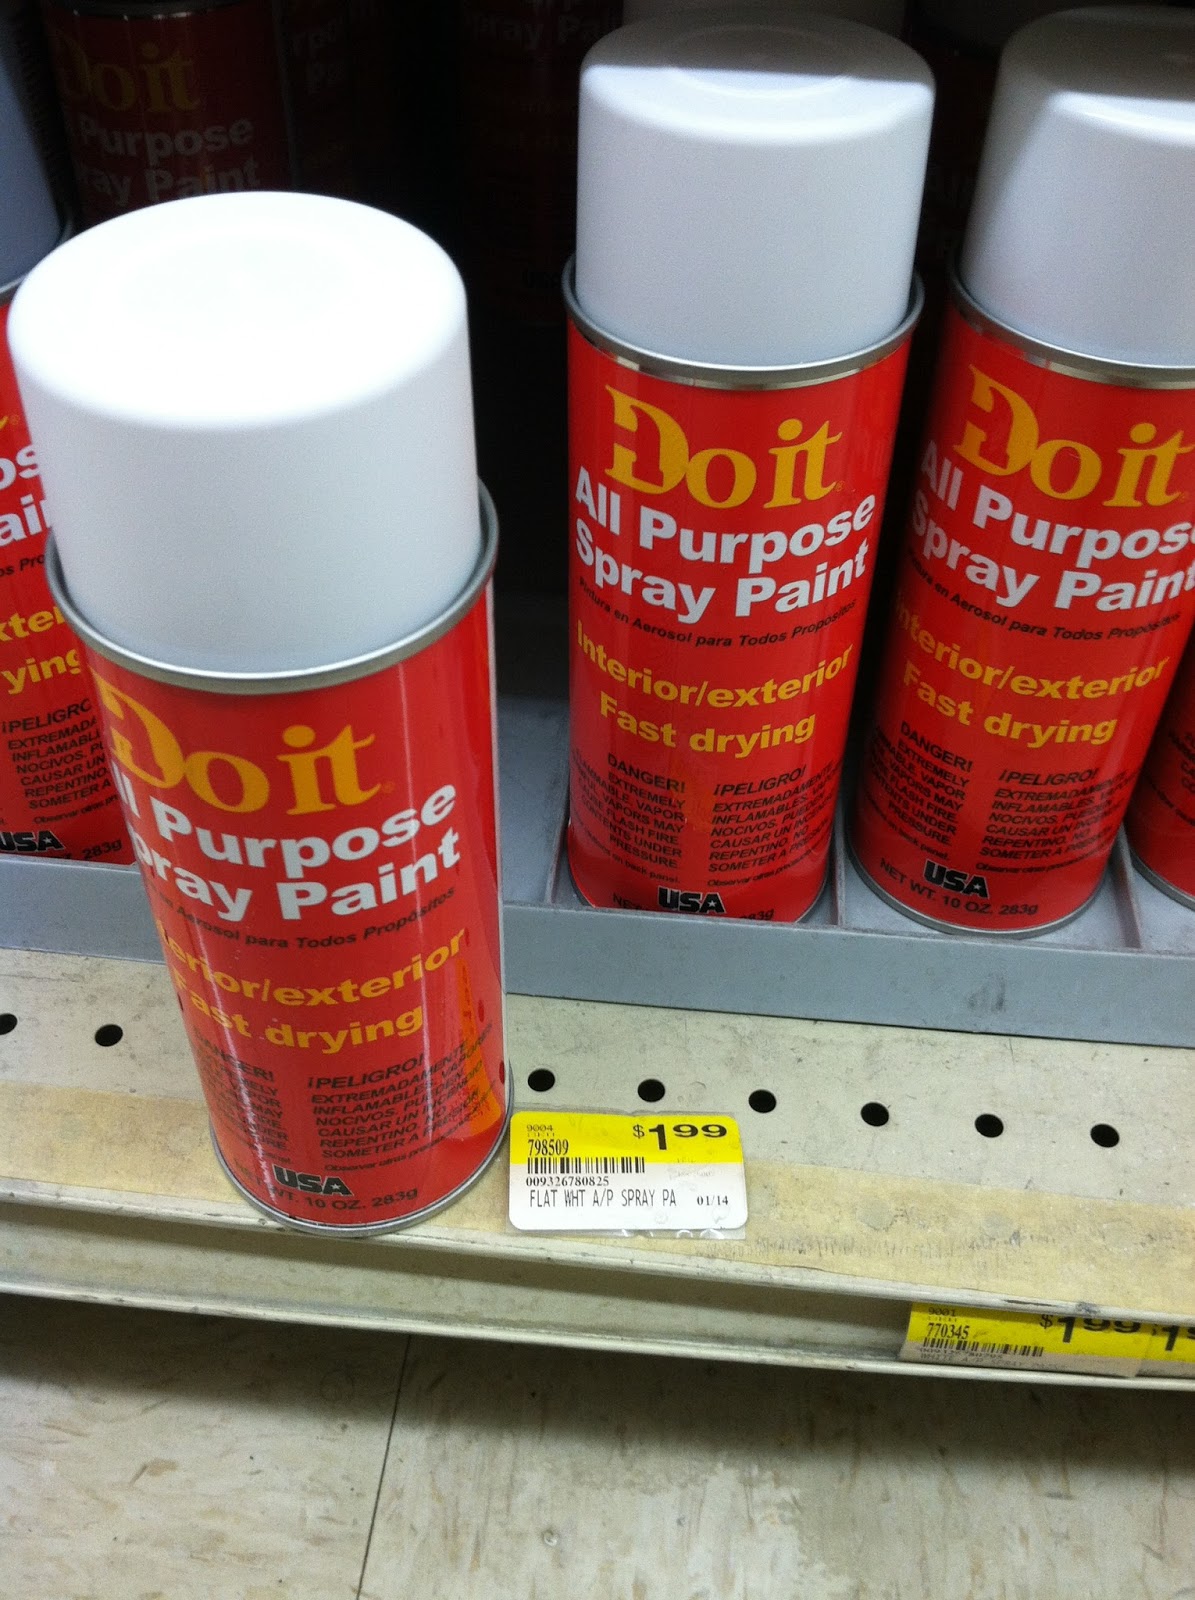
About to paint reconstructed vintage post covers with 'Do It' flat white spray paint, $1.99 a can. 

Top is my personal A Frame's covers, below is the current reno's old unpainted ones. 

As found at my local small mom and pop hardware store. 

Painting in a small flat cardboard box allows for a nice flat surface free of debris and  pet hair. 

Supplies you will need: Exacto knife kit (ebay $3), ruler, pencil and scissors. 

This is how you will score each piece of cut pasteboard square (50 cents a sheet at dollar tree). 

Left side is newly made from poster board, right side is original. See it even saves you from having to paint anything. 

Alternately, you could use the measurements I provide and score with ruler. 

13" post covers, left side is paper, right side is vintage plastic. 


It is probably the most tedious and boring portion of the reno, but makes the finished product really shine. PS use the outside glossier side of the poster board, so score on that side for outer corners.

Measurements (in centimeters) are:

Smallest covers: Piece of paper  9cm x 7cm  (4 each)
Shortest of the tall covers: 9cm x 32cm (12 ea)
Medium tall covers: 9cm x 35cm  (4 ea)
Tallest tall covers: 9cm x 37.5cm  (4 ea)

Score ALL covers using the same distances between corners: 1cm space, 2.5cm space, 2.5cm space, 2.5cm space, 1cm space.

You will need a total of 3 poster boards ($1.50 total investment plus Exacto knife if you don't already own one).