
BPBC1+c)Lg~~60_12.jpg) |
| 2009 Playmobil Unicorn Princess Castle (small version). Redone below. |
 |
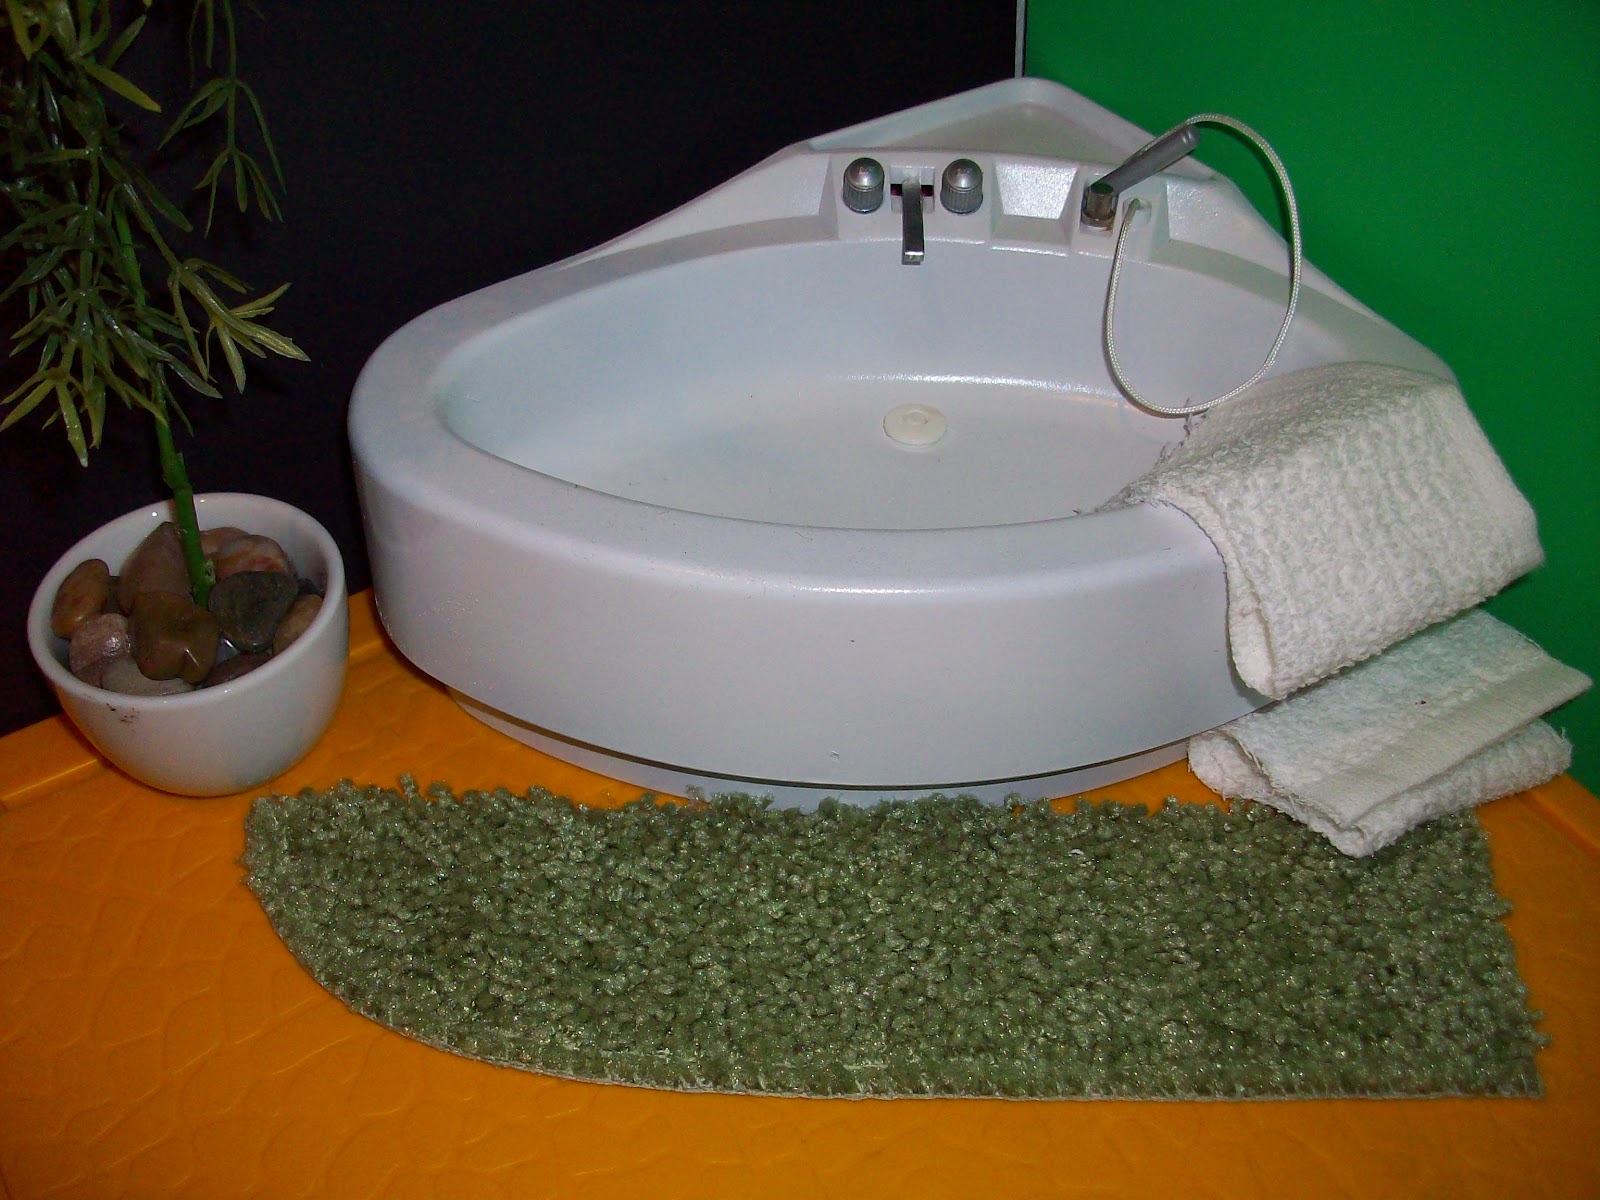
| Grrrrrr!!!!! Merman's tub now! |
 |
| Old, dirty lot of pink tubs (before shot). |
 |
| After mucho primer and Rustoleum products. Ah, thats better! |
 |
| No, I am not Gargemel cooking Smurf soup for lunch. I am selling my 30 year old Smurf houses (aint January a great time for spring cleaning?) and they were so grubby, bent and discolored I had to do something with them before expecting someone else to pay for and love them. This is also step one for any used toys you get that you want as minty as possible again. Hot water makes them soft and pliable as well as sanitizes them and loosens dirt. |
 |
| The during, primer is a must or else you are spraying 1000 coats of drippy color that you can still see the nasty old color looking back at you. You can see I really went to town with a sharpie marker back in 1983. |
 |
| I purposefully left the undersides original to show that the renovation was indeed necessary. |
 |
| The after village. The orange is remeniscent of the 1970's German Smurf house,with no white dots. |
 |
| The real life renovator in me couldnt resist upgrading to hardwood floors in Papa Smurf's house. virtually free and completely removable. See, the primed chimney is lighter and a flat finish, actually I like that better then the darker, shiny window frames. |
 |
| Ta daaahhhh....... |
 |
| I had no idea it would take me 3 hours to assemble this 70's yellow 'house'. |
 |
| Finally done. I always did love a nice Lego set for my birthday (still do!). Substituting lost parts is what took half my time, so I am not a total mental midget. What a crazy Saturday night that was! ;-) |
 |
| Cutting apart the magenta wall (thank goodness for my black and decker dremel tool, that was the best $30 I ever spent) is essentially necessary as the factory original castle is basically a stationary cookoo clock. one sided with funny little doors that open to a scene inside. Kind of pedestrian if you ask me. Naturally the hot pink had to go. |
 |
| The all important priming step. I should buy this stuff by the case. PS Auto paint is the highest quality paint I have ever used. the blue for the turrets is auto spray, and you'll notice its the same blue as the inside of the 1984 hot tub. its so nice to work with. Its not nice to not ever get carded by the store clerk since spray paint is an over 18 product now. |
 |
| The rest of the parts once disassembled. The stickers come off in one nice piece, I think they are vinyl. One left behind a glue shmeer, but I keep acetone under the sink for things like that and it came right off. This set is kind of a baby toy, but I knew I would love the end result, and the $11 for this was better then the $150 for the Playmobil large grey castle I am saving up for. |
 |
| Getting ready to contact paper the doors. The big decision was wether to paint them brown first, or leave a gold trim. I opted for the gold trim because you'll see these doors have a gold 'lock' on the bottom and I didnt want that brown. This way it looks like a metal. I had 4 shades of wood grain (fetish much?) and this was in the middle. I think the medium tone blends well with the white body of the castle and other lighter colors used in the diorama. |
 |
| Finished product. The handle between the turrets turned into a front stoop. Its just primed grey, so one step easy. I added a duck pond from blue paperboard from you guessed it, the Dollar Tree. I also rearranged the vineage so now there is a rose bush. |
 |
| The cut off wall is reversible, I applied the interior wall sticker back on in so you can stand it up and have a wall as an option, the chair is 1/4 or 1/2 inch scale (the real small kind, bought in a grocery store, late 70's a perfect match for a castle this size). |
 |
| The turrets are now attic space with hardwood floors, same tone as the doors. |
 |
| The floor is a square cut off from plywood in the wood aisle of Lowes. A rectangle that yielded 8 of these squares cost about $6. one side is nicer than the other. I had 6 mini cans of stain in the garage and chose this shade, glad they are getting used for something, just make sure you sand first. I also put little rubber cabinet bumpers as feet on it so its toaly done. If I do this project again (scored the castle for $11 total) will do a cream colored body with red turrets. |
 |
| 2002 Barbie Rapunzel Castle Tower redone as Spanish Mediterranean Villa with hardwood floor. |
I love posts like this, great stuff!! :) :) :)
ReplyDelete