Sunday, July 3, 2016

Restoration of Old Screws Part 2

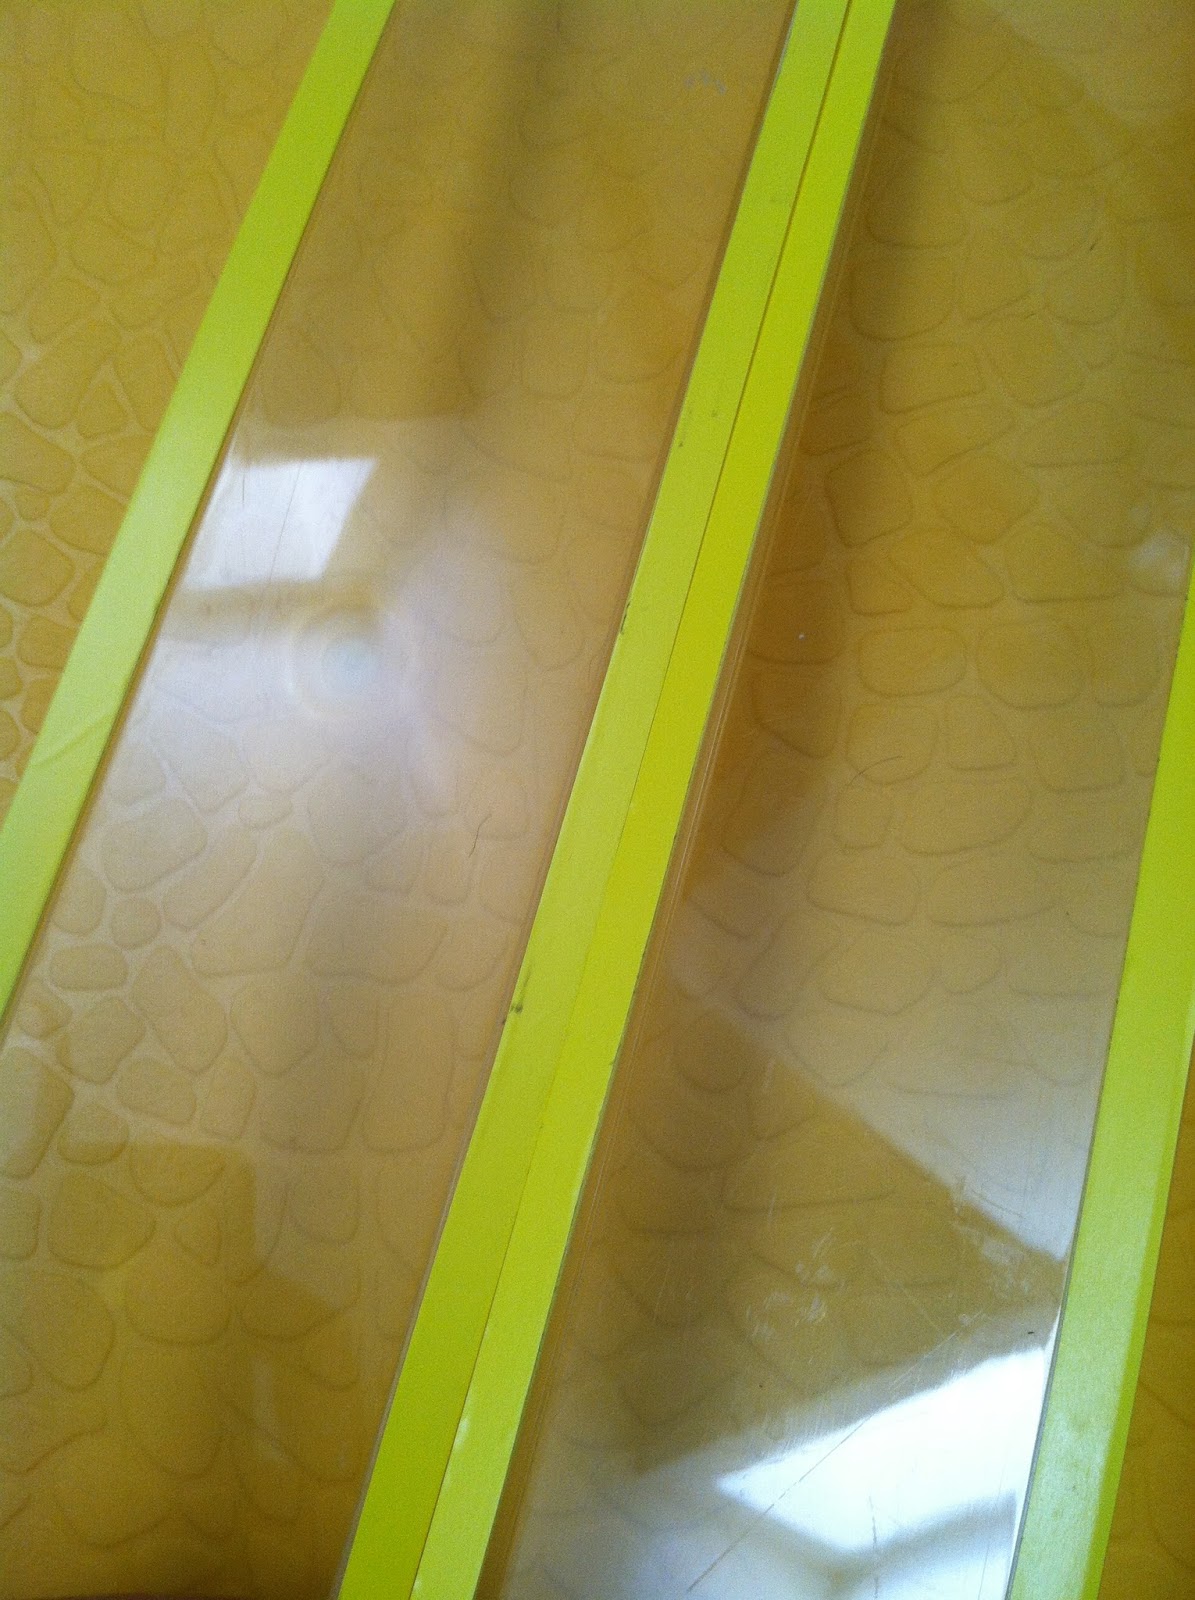
using WD 40, left screw after right side before. 

left side after, right side before. 

left side after, right side before

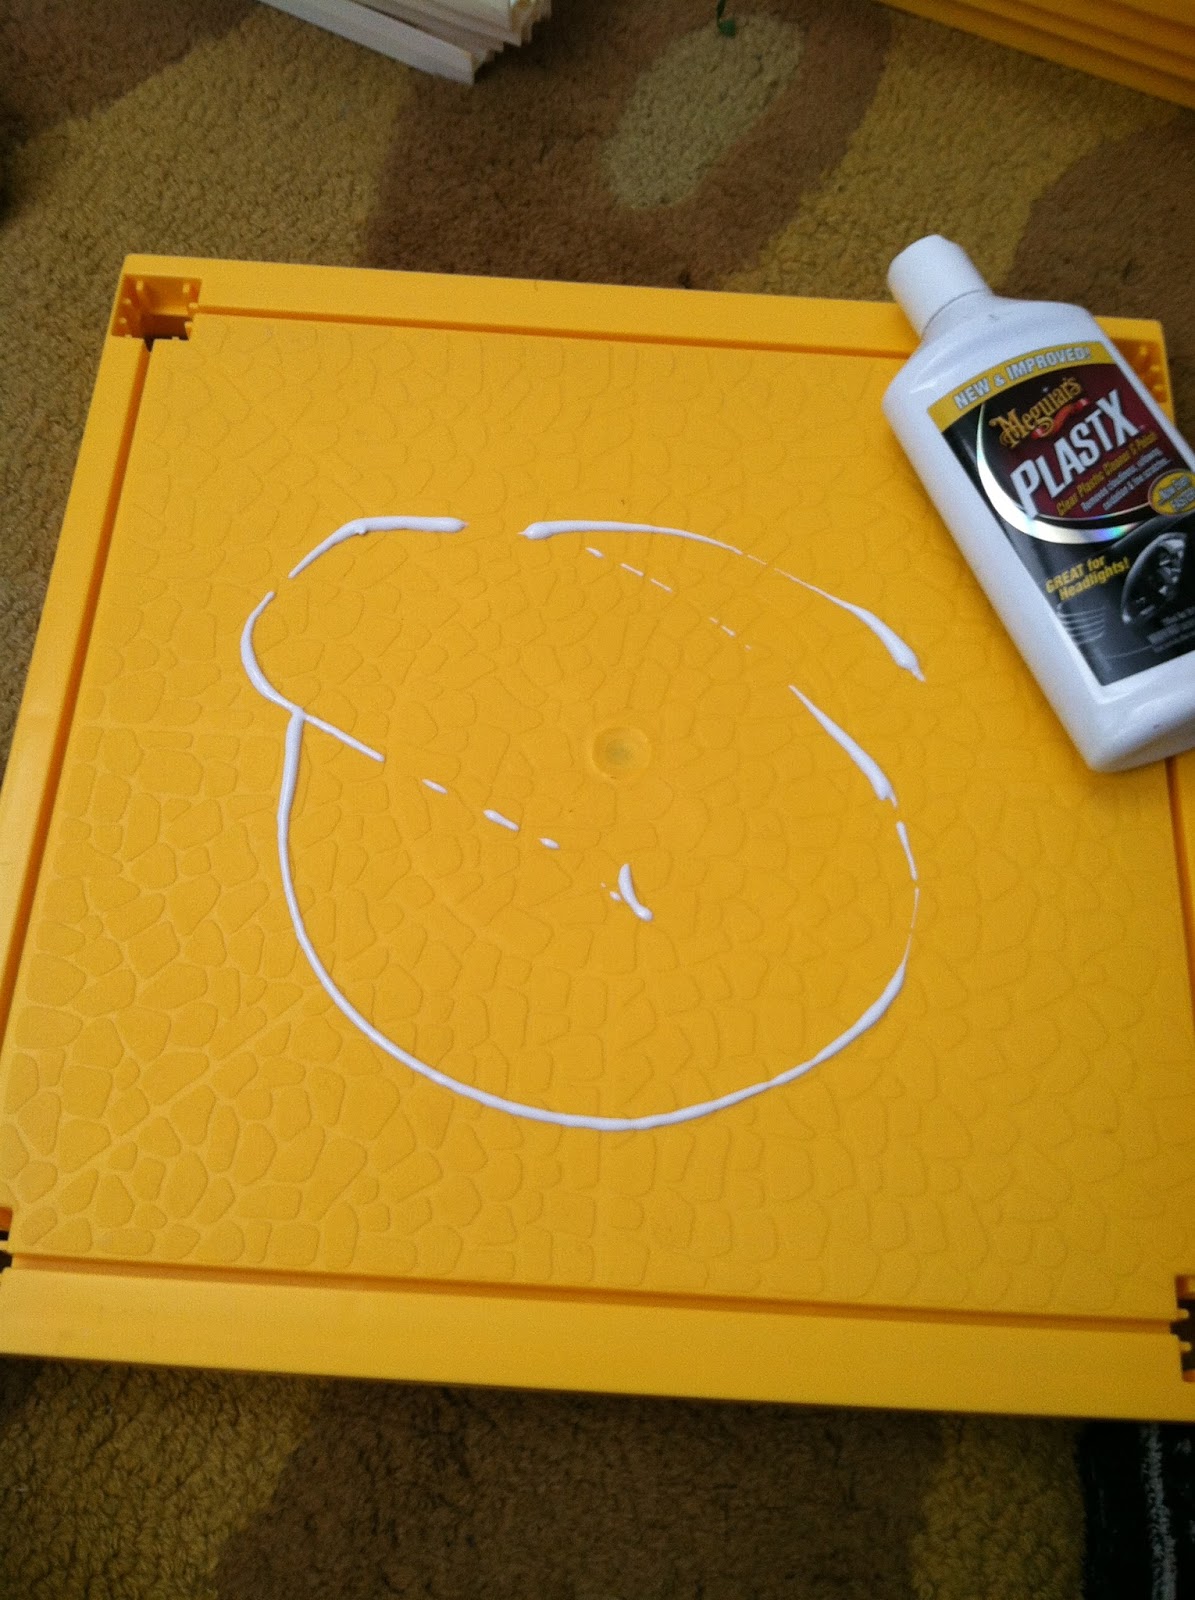
WD 40, fine grade steel wool, soft rag

Step one, spray screws with wd 40 while inside a small baggie, this evenly covers all screws with wd 40, then one by one hold screw in rag (but its easier to put screw into a drill, tighten grip and held drill in lap while polishing), polish with steel wool till shiny (push hard), then wipe off residue with soft rag. the before screw is dull and light in color, the after screw will be dark and shiny. also the oil will let screws go in easier especially if you had to purchase new screws that are a tight fit for the house. helps avoid post splitting.

 I cannot remember the replacement size, but possibly ⅜" sheet metal screws, just bring what you have to the hardware store and they have charts to match up odd screws, the big difference is that flat head screws are difficult to find nowadays, so you will likely be replacing them with phillips star heads.

Long screws are 1 ⅛" long, the short ones are 9/16" long


keyword terms: barbie doll house dollhouse vintage 1970s 1978 1979 a frame malibu chalet orange yellow red white pink hot free for sale ebay pinterest etsy new old renovated dolls fashion clothes clothing lot estate parts wall walls door doors window windows part balcony closet flower flowers planters planter plant plants box boxes accessory accessories small pieces info information instructions how to put together where to find buy purchase locate available collector collectible gold silver platinum label individual post posts covers sides custom 3 three section sections patio triangles floor floors dark light build scres pictures club group rare custom ook htf oop in mint clean complete 1980 1981 cottage 1982 1983 1980s color colors anniversary 1984 1985 1986 large bog 3 ft 4 feet long high tall huge large open moveable arrangeable craigslist online forum question questions 40th 50th 45th 55th 60th 35th reproduction remade retro nostalgia nostalgic memories childhood play display mini miniature set up sections  mid mod mid century modern 60s kitsch fun playful open new design designer interior decorator decor designer  
architect architects idea ideas goal aesthetic eames eichler palm springs by the sea malibu granola earth tones earthy autumn wexler wood slats open playful fun 1960s 60s open playful play timeless heirloom 


Saturday, July 2, 2016

Replacing The Flowers : June 2016

Marshalls, it always pays to look at everything, especially when it is on sale. all the flowers on this wreath easily detach to make up flower planters and window boxes. 
Joann fabrics has quite the floral dept with tons of suitable replacement plants for the A Frame 

Fern like little plastic leaves, scale and detail are perfect. 
You'll find these houses are nearly always missing a good portion of the flowers/foliage. If your budget allows for more than the dollar store I highly recommend Jo Ann Fabrics. they had lots of great plants that if parted out would be very economical for several houses. or you could just sell the left overs as 'generic A Frame replacement foliage'. I got a few lovelies today that I can use on the current restoration project. In fact, my restored flower beds often look better than factory since I am using higher quality florals and quality (detail) has improved in the last 40 years so it gives an overall superior look. You can clean dusty old flowers under the faucet tap with a toothbrush, then shake dry.

Currently at dollar tree, the small white flower bunches nearly identical to the 1978 Barbie A Frame Dream house. They had several bunches. 

Small white plastic Baby's Breath at Dollar Tree. not a factory match, but would do in a pinch. =-) 

"Grass lawn" as found at Home Depot. 

Michael's, winter 2016, avg price $3.99-$12.99 for GREAT plants. I would buy these for mine, but not for a house flip since it could easily add $10+ for someone who won't even bother to leave positive feedback, thus I use dollar store flowers and leftovers for houses I sell. 


The photo does not do these justice, I just got these from China via ebay, they were among the cheapest. I really really love them and cannot wait to re do my personal A Frame's flower boxes and planters. They have a nice vintage look to them and are much higher quality than what came with them originally. There were others I wanted, but either they were too large or too pricey.  
Currently at Joann fabrics (now largely a craft store like Michael's), these pix don't do em justice, the detail is fine, they would work perfectly to upgrade the planter and flower boxes, they were, however, $7 each, so I am waiting to buy those. 
The best deal of all: Family Dollar! I would have bought these, but I already ordered so much from China via ebay that I have enough for 2 houses now, though I know where to go when I get low! =-) 

I like these sheets of green because they are good to use for filling in the empty spaces in the flower boxes in between the larger plants. Usually, they are $10 at Michaels or Joanns, but these are a new find at this store.

Friday, July 1, 2016

Restoring Closet Doors: Adding the Mirrors

During. Be very careful to cut a straight line or it won't come out right. I took my thumbnail and dented the inside door trim line so the blade would have a groove to fit into. 

Almost done, this is a 10 minute project, totally worth it. 

Left: Before, Center: Replacement mirror, Right: original with scratches and flaws. 

Corners can be tricky

After. I am glad I did it. One more door to go. Also notice the wire hinge on the top left door, it works perfectly and is sturdy, the bottom wire you never see once the door is in place. 
Use imitation stainless steel contact paper as found at Lowes or Target. Its thicker than usual shelf liner so makes it easier to work with on flat surfaces (less air bubbles), but for impossible for rounded surfaces and corners. I guess the furnished house in 78 came with the mirrored doors and patio triangles, subsequent unfurnished houses in later years did not and i have not seen a pink house with mirrors.


If you choose to cut it on the outer edge, it gives a nice beveled glass look, one which I prefer and would do from now on except that on this one I cut on the inner edge on the first door so much follow through with that now. 

1978 Mattel A Frame Barbie Dream Doll House Red roof yellow floors mod groovy 1970s 1980s custom OOAK parts doors windows mirror fashion closet clothes hangers restoration

Thursday, June 30, 2016

Wax on, Wax Off: Buff out the Scuffs and Make it Shine with Meguiars Car Cleaner Wax

Definitely not the way it came, "straight from the attic". 
Left is shiny after on same roof rafter, right is before Meguiars  Car Cleaner Wax. I honestly didn't know what MacGuires could do to this toy, I thought maybe it might whiten it (no) but it buffs out the scuffs, and makes it shiny for sure! 

Even though this roof is faded, the left shows the potential for restoration, though now that this Meguiars  Car Cleaner Wax has been applied it probably is not paint worthy unless one went to the painstaking process to completely remove it. 

Stunning before and after. Plan to rub really hard or else you will leave Meguiars  Car Cleaner Wax  in the little grooves. 

Underside of roof, takes like 30 seconds. 


Polishing with Meguiars  Car Cleaner Wax restoration cream will remove the top layer of oxidation, kind of like when you get your car's paint sealed. See the yellow from the door frames and red from the roof?

Meguiars PlastX is what I use on my car headlights to prevent hazing, I thought it would clear up any yellowing on A Frame windows, however, it ends up buffing out light scuds and making everything really shiny. a great alternative to Meguiars  Car Cleaner Wax
Use about this amount of Meguiars PlastX cream, then buff really hard, plan on using lots of elbow grease. 

After on a balcony door, Meguiars PlastX didn't get the deep scratch out, but eliminated al l the tiny little ones and made it really shiny. 

Its hard to tell the difference here, but in person you can totally see the difference. When you're buffing these out they will squeak like a mouse but they are squeaky clean when done. Finish off with windex for that perfect, streak free shine. 

Use about this amount of Meguiars PlastX , rub it in really hard (good tricep work out). 
Closet box: Left side is the before, all scuffed up and dull, right is the after, it only takes about 30 seconds to a minute to buff it out with a rag and a strong tricep to apply to pressure. I suppose an orbital buffer would do the trick as well. 

A word to the wise, DO NOT apply Meguiars  Car Cleaner Wax  painted/colored window and door frames, it acts as a paint thinner and removes the yellow. But it is just fine on the molded plastic colors. It doesn't just make it shiny, it cleans it to a level that soap and water just cannot do, it seemed to lift off residual grease marks and definitely colored scuffs on the sides and corners of the roofs and floor panels.

This actually ended up working slightly better than the plastic polish. They both contain petroleum silicates and aluminum oxide (micro polishing agent), cleaner wax is a little more liquid consistency and has more in the bottle, can be found in the auto section of most stores. 
voila! Meguiars  Car Cleaner Wax
nice...Meguiars  Car Cleaner Wax
So worth the time and effort. Meguiars  Car Cleaner Wax
such a huge difference! Meguiars  Car Cleaner Wax


You'll need a fine, soft brush to clean off the cream from tiny crevices. 

Portfolio of after shots of "polished" house. 

This is the before of the house as it comes from Ebay, "Fresh outta da attic/garage/backyard/trash heap". 


Fixing Broken Door Hinges Par Deux: Using a Drill and Wire

Drill, baby, drill. Get the smallest drill bit you can find, wedge the door between your legs (careful here), aim straight and go for it, just the tip though, about a quarter of an inch. =-) 

This small picture nail was the perfect width, however after trying to snip it off with wire snips (tough) both pieces ended up shooting across the room never to be found again. This could be remedied by draping a small towers over it before you clip, to make it easier, squeeze on one side as hard as you can, then turn to the other side and squeeze again, it should pop off then. 

This bent paper clip was far easier to wire snip off to the perfect length, but definitely required glue in the hole to keep it in place. 

This is the longer peg, I laid door flat, made sure both pegs were sticking out straight, and let dry overnight. 
This should be functional, however, you could go to Michaels and get yellow clay to mold an original looking peg surrounding over the new metal pin. Its not worth my time for a house I know I am going to sell, but I would def do it for a door for my house.

1978 Mattel A Frame Barbie Dream Doll House Red roof yellow floors mod groovy 1970s 1980s custom OOAK

Fixing the Door's Broken Hinge Pegs: Volume 1

After: door swings just fine. put the original peg in first, then carefully bend door in the middle to place new tape hinge under and into the upper hole (use upper as that is less pressure on the hinge as the bottom hole), the hole itself ends up molding what was once a flat square mound of layers of tape into the exact shape and size peg that is needed. 

Seems to be sticking on there just fine, though glue could be added to tape to make sure it doesn't slide off. 

Tape mound came from left over tape trim from resurfacing the faded windows with hardware aisle tape. 

closet doors: un molded new peg, will probably not work to well for the longer bottom peg on these doors but haven't tried it. 
This is the quick, easy fix. I am about to try drilling a tiny hole into the closet door edge that is missing the long peg and sticking a wire in it as suggested by a subscriber. Ill post about that after.


1978 Mattel A Frame Barbie Dream Doll House Red roof yellow floors mod groovy 1970s 1980s custom OOAK