 |
| Phasing Disco Barbie out, the colors on the house are sharp and saturated (what a refurbished one ought to look like), no more patio triangles. =-( |

This site is for all things Mattel A Frame Dollhouse for Barbie. Use search box for posts explaining with photos about: purchasing, proper cleaning, carefully restoring, replacing missing pieces, free assembly instructions download, upgrading and customizations, add ons, accessories, furniture, staging and more! If you would like to contact me for questions and to show me your photos you can reach me at: AFrame1978Guy@yahoo.com
Tuesday, January 7, 2014
Vintage Ads: 1981
Tuesday, July 9, 2013
Blogger's Own: Furnished OOAK Green Repaint


As fans of the site may already know, I am not a huge (or even small) aficionado of the dolls. I did have my eye on this particular beauty. She is from the 007 line, its Solitaire from 'Live and Let Die' played by British actress Jane Seymour in 1973. She is the perfect doll for the green A Frame because orange is opposite to green on the color wheel, and my target period for the home is 1973, the exact year her style is from. Though I cringe at de-boxing Barbies, I was delighted to see she is very well made, the dress is very thin, but looks great so its ok and she has exquisite real eyelashes.
Anyhow, when designing the house I considered making the doors and some planter box flowers orange to contrast the green, it looked a bit too much like the Irish flag and ultimately I decided monochromatic was the way to go. But I still think she and the orange look fabulous and she was bought just for this house. Besides, she (newly christened, Brandy Eberhart) is a great hostess. Her husband, Mike, is away on business a lot and she loves to entertain. With the kids at boarding school keeping the house clean is a breeze. She is an expert cook and has an affinity for quality appliances. I think the ivory colored Sindy china is a welcome addition to the mix, there just wasnt any room for the matching dining set, even in this large a floor plan.
 |
| Book reading light from the dollar store, comes in several color choices. |
 |
| You know, Im kind of diggin the pink and green together, sort of reminds me of watermelon, but if anyone wants to make a green A Frame Barbie OOAK house with the entire line of pink furniture (since this is the only pink I own) and photograph that would be great. |


Would Rhoda move into this house? Something tells me she would, especially if there was a cute guy next door. Oftentimes when I am in a dilemma I ask myself, 'What would Rhoda do?'
1978 Mattel A Frame Barbie Dream Doll House Red roof yellow floors mod groovy 1970s 1980s custom OOAK
Wednesday, July 3, 2013
Blogger's Own: Green Repaint OOAK Custom Barbie Dream House
 |
| Solution for not having a closet, balcony or balcony doors. Foam board inserts can be covered with contact paper, scrap book paper, wall paper or anything else you like. |
 |
| Staggering the front facade forward provides depth and dimension. |
 |
| Upper center piece is nice and open for play/display when you reverse the usual wall configuration. |

 |
| The wall art is the back of someone's business cards. the white planters are plumbing parts from the hardware store. |

 |
| Gloria apps. |


 |
| Hand made flower boxes (painted craft cubes from michaels). |

The windows are from a packet of report protectors from Office Deopt item #230890 for $10.99 and I had lots of left over for additional projects. I cut L shaped sections and scotch taped them into place. The same 'frosted glass' effect is used for the 4 doors on the back of the house. I used foam board to fill in the closet hole and paper board behind the diagonal slats (the house was always a little too open for me so I used a bit of artistic license to further customize this empty shell). The tile floor is just a copy of contact paper I have so is not attached. The front lamp posts are made out of leftover wood pieces I had from a project (originally an Ikea coat hook) and ping pong balls glued on top. The suspended globe light in the upper center section was made from a ping pong ball taped to a long thin strip of paper board. I ordered my ping pong balls from China as I didnt want to drive the 45 minutes to the closest ToyRus and didnt think Target would have them. I waited 2 weeks for them only to see them at the drug store in the beverage aisle as I was getting last minute 4th of July items, lol. The front stone patio section is craft paper from Michael's attached to a peel and stick floor tile. The doors where the hardest to make they are a sandwich of foam board, green paper board, green electrical tape from Home Depot and more report protector 'frosted glass' with green thumbtack handles glued on. I wanted to make all the rear doors the same full length frosted glass as in the center section, but ultimately decided that veering too far away from the original house would be detrimental to its overall look and resale value. About 3/4 of the post covers on this home are made from paper board. Just cut to length and score with a good exacto knife and there you are. The washer, dryer and toilet are painted Gloria pieces. And as most of you know you can get indoor/outdoor carpet from the hardware store to use as grass. You will want to have double sided scotch tape to use especially for the doors, it was indispensable for this project. For the oven I could have used a transparent green report cover plastic to replace the pink, and green taped over the pink stickers on the fridge, but I had to stop the insanity someplace. =-) I like the staggered look of the side pieces being set back. Hypothetically, you could foam bard in the openings in the walls in front and rear to close the house in and make it look more realistic. If this house had a permanent place in my home I would do that. I think setting the side pieces back adds more depth, dimension and visual interest to the home, though in a straight line still looks pretty good, too! Also, eliminating the balcony, for me at least, removes some of the Bavarian ski lodge look and makes it more period '1970's Americana' ala the neighborhood from 'The Incredible Shrinking Woman'.
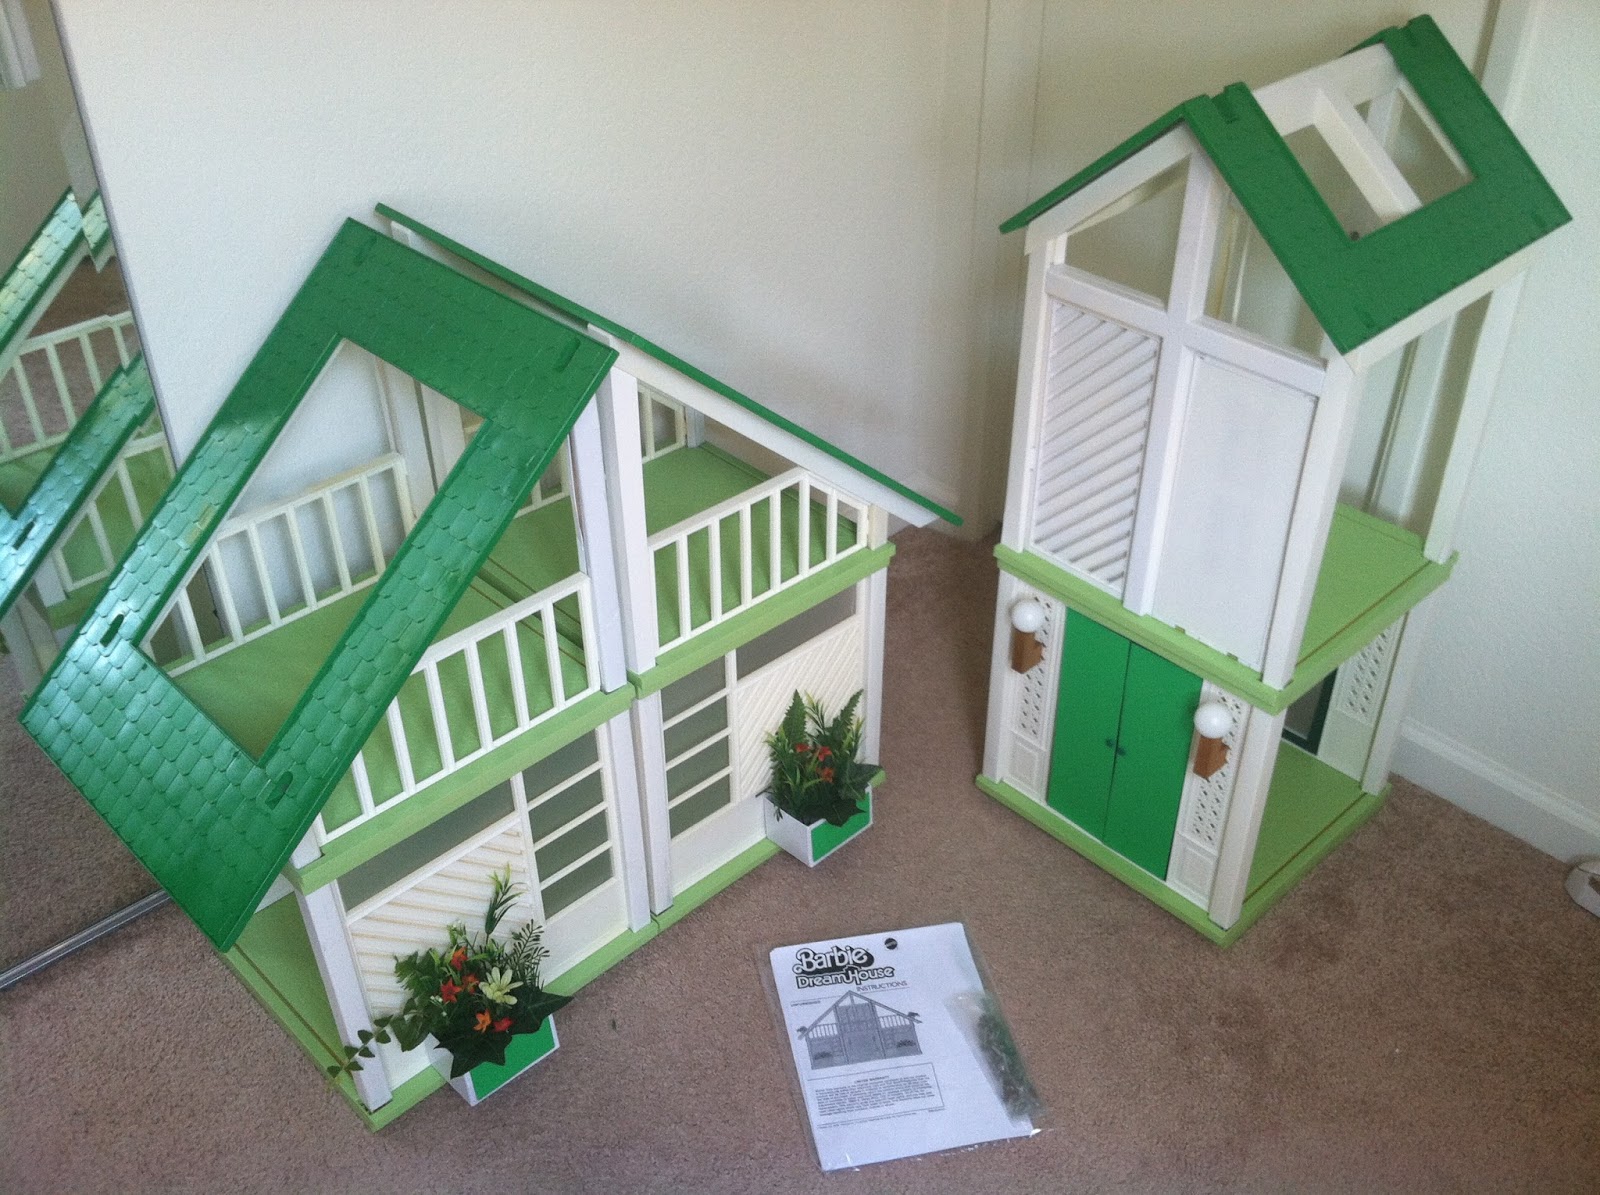
This is the house I creme bleached the parts on an earlier post. When I got the house I knew this was my chance to totally customize a house to whatever I wanted since it was without any small parts it was not worth restoring it to its original shape and it was bought inexpensively so I thought long and hard as to how to reinvent it. I have really only seen houses repainted either black and brown or shades of blue. I was going for a different kind of 'early 70's' look and thought green. If the floors are green then they can pass for green shag carpet and the darker green roof is just eye catching. I believe what we have is a monochromatic look in keeping with white walls and matching floor and roof pieces. I am very happy with the final product. The only thing I would like to have done differently is to have a complete house to transform and not just the shell. I do love this one of a kind small house and will probably sell it but want to enjoy it for a little while longer. =-) Also, I could have filled in the upper railings with paper board behind the slats to further close in the house, but just ran out of steam. This has been a several week long process.
PS: I may have gotten the idea from the 1956 Saturday Evening Post ad I read earlier that week.


 |
| Me spray painting in the garage, just kidding, I look nothing like Pat Kramer. |
 |
During, quite messy, a word of caution, I did lay down a large heavy tarp but the color particles are quite light and dry so they float around and land on anything (be sure to wear a breathing mask unless you want to hack all night) But anyway, painting green over yellow floor pieces took up lots of paint and would have done better being white first ( I didnt bother to paint the underneath), here you can see the roof pieces freshly painted white in order for the kelly green color to show. lots and lots of work, folks. The inspiration behind the look, tall dramatic entryway, double doors and globe lights. I am not opposed to doing an accent rock wall ala the Brady Bunch I just dont quite know how to do it yet. All I have is faux brick for miniatures. Some of you TV fans may recognize this from the Tasty Meadows neighborhood. |


Wednesday, June 19, 2013
Restoration: How To Properly Renovate A Frame Metal Screws
Okay, we're all friends here, right? I used to spray paint over rusty screws (they were never galvanized) with silver spray paint. Looking back I dont know why I didnt just buy a rust remover or do the below described routine. But now I know better, so I do better. FYI, because they are not galvanized, NEVER, ever hose down your A Frame with the screws still on. They will corrode, stain the plastic, and break off when you try to remove them.
I cannot remember the size, but possibly ⅜" sheet metal screws, just bring what you have to the hardware store and they have charts to match up old screws, the big difference is that flat head screws are difficult to find nowadays, so you will likely be replacing them with phillips star heads.

The third screw from the left is all the way polished/de-rusted, the one to the right of it is half way done, and the rest to the right of it are yet to be done.
I cannot remember the size, but possibly ⅜" sheet metal screws, just bring what you have to the hardware store and they have charts to match up old screws, the big difference is that flat head screws are difficult to find nowadays, so you will likely be replacing them with phillips star heads.

 |
| This Dremmel tool is about 10 years old, but I am sure they still look about like this when you go to Home Depot or Lowes to pick yours up. They should run about $30-$40 depending on what brand and how many accessories come with it. I have used mine for countless projects, so its really paid for itself many times over. |
 |
| The small screws on the left were in pretty good shape but all the longer screw heads had moderate to severe corrosion. The polishing/grinding tool I used is in the photo, they come right up in a few moments of even buffing. you can polish it off with sand paper, spit and wipe with a rag. Don't try soaking them in CLR, I did and 20 minutes later was horrified to find they were once again corroded. You could try the $6 bottle of rust remover (looks like pink jelly) but I was too cheap to buy it. I did finish them off with a light spray of WD40 (then shake in the ziplock bag to evenly disperse oil) so when they are used to assemble the house again they will go in easier. |


Sorry I dont have the exact bolt sizes but this should help you some. If you have at least one original bolt take it to the hardware store and there is a size identifier card on the shelf next to the bolts for this exact purpose. Remember not to force a too big bolt or it will definitely crack the surround, get the right size and then put a tiny half spray of wd 40 on it to ensure forever easy glide and non rusting. Good luck with it. =-)
1978 Mattel A Frame Barbie Dream Doll House Red roof yellow floors mod groovy 1970s 1980s custom OOAK
Thursday, May 30, 2013
Restoration: Bleaching the Beige Parts to White Again
Since the 70's many plastics contain bromine, a flame retardant that is the culprit behind the yellowing (this would explain why my 1968 GI Joe Seawolf submarine was still bright white in 2009 even though it predates the A Frame house by 10 years). It is a chemical process that has been discovered to be REVERSIBLE! Its done by making a paste of corn starch (or xanthum gum), 12% hydrogen peroxide and oxyclean (generic at Family Dollar), alternately it seems you can use peroxide cream from Sally Beauty Supply, or the proprietary RetrObright. Brush on with a flat paint brush (much like a BBQ brush, but wider), wrap in cellophane and leave in the sun or a UV lamp all day, rinse, dry and enjoy.
http://www.hardwarezone.com.sg/feature-how-whiten-your-yellowed-plastic-gadgets
http://www.youtube.com/watch?v=ysj2PlMPohE
http://lifehacker.com/5164208/retr0bright-restores-yellowed-vintage-plastic-to-factory-fresh
Many vintage Apple and Nintendo nerds are using this with success, so lets hope this works with the Barbie house. Please post comments and email pictures so other readers can use techniques that work best. =-)
I have tried this technique using Salon Care Professional 20 volume regular lift creme stabilized formula 4 ounces for $3.00 at Sally Beauty Supply.


 |
| The supplies you'll need. This one small container technically will cover all of your white A frame pieces once, but if you want to really drown parts in it or add a second application then buy the large container its only $5 I think. |
 |
| The during should look something like this. I used dollar store seran wrap. |
 |
| After, the left side is what I decided came up good enough to not paint. The right side lightened some, but not enough, so will have to be painted. These were left in the hot sun all day for 2 days (flipping sides on the second day). |
So, in summary what happened is that the parts that were slightly discolored lightened enough to not be painted, the parts that were very discolored lightened some, but not enough and will have to be painted. Verdict: I could try a different creme, or make my own using the above mentioned ingredients (and even make it stronger) and perhaps achieve better results, however, for this house I am pretty sure I will just paint the dingy half and call it a day this time.
The left side parts are not perfectly sparkly white like when I do a repaint, but overall its better to have non painted parts, it technically devalues the house since you have to disclose its painted. It is more work to have to clean everything, creme bleach it, clean again and still have to paint half the parts anyway. So, totally a labor of love if you are up for it. =-)
 |
| So, when you receive a house that is this far gone, you now know how to brighten the white without having to paint it. It still is surprising to me how faded roofs and floors look so much darker and richer once the white walls are lightened. |
keyword terms: barbie doll house dollhouse vintage 1970s 1978 1979 a frame malibu chalet orange yellow red white pink hot free for sale ebay pinterest etsy new old renovated dolls fashion clothes clothing lot estate parts wall walls door doors window windows part balcony closet flower flowers planters planter plant plants box boxes accessory accessories small pieces info information instructions how to put together where to find buy purchase locate available collector collectible gold silver platinum label individual post posts covers sides custom 3 three section sections patio triangles floor floors dark light build scres pictures club group rare custom ook htf oop in mint clean complete 1980 1981 cottage 1982 1983 1980s color colors anniversary 1984 1985 1986 large bog 3 ft 4 feet long high tall huge large open moveable arrangeable craigslist online forum question questions 40th 50th 45th 55th 60th 35th reproduction remade retro nostalgia nostalgic memories childhood play display mini miniature set up sections mid mod mid century modern 60s kitsch fun playful open new design designer interior decorator decor designer
architect architects idea ideas goal aesthetic eames eichler palm springs by the sea malibu granola earth tones earthy autumn wexler wood slats open playful fun 1960s 60s open playful play timeless heirloom Thursday, May 23, 2013
Real Life Examples Summer 2013: Living Now: Consumer Guide To Better Housing, Summer 1971 Issue
 |
| I bought this about 20 years ago at a flea market, I havent ever been able to find any other issues, so glad I grabbed this one so I could post pics to my blog! This magazine taught me that the design of the Mattel 1978 A Frame Dreamhouse was not just from 1978 but stretched as far back as at least 1971. |
 |
| Floor plan 1 with real life triangle patio piece. |
 |
| Floor plan 2 with triangle patio. |
 |
| Floor plan 3 with triangle patio, see you thought it was just a toy. Someone out there really has this for their home. =-) |
 |
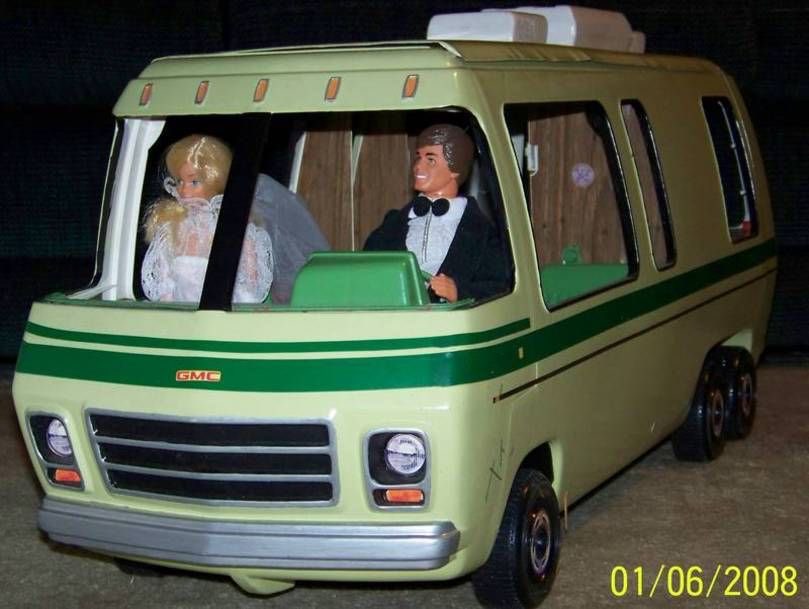
| They kind of look like Ken and Barbie. |
 |
| Today, I bring it, devoted fans. Where else would you see the real life triangle patio section? Not to mention the diagonal slat walls. |
 |
| The inside of this real life 70's groovy pad. |
 |
| How to decorate your new home. |
 |
| Mod 360 degree fireplace suspended by chains. |
 |
| Real life upstairs center piece. |
 |
Side section profile with theoretical driveway and inexplicable wood wall. |
Subscribe to:
Posts (Atom)